Welcome to the latest edition of ‘Workout Wednesday’ when I share a new running workout or strength training for runners exercises. This week we are talking about foam rolling because mobility and prehab (injury prevention exercises) are as important as your daily workouts. You can skip them, but eventually, it will catch up with you. Do the work upfront to improve performance and avoid injuries in the future.
Runners and foam rollers go together like runners and black toenails, and runners and race medals. The pleasure, the pain, the joy, the suffering, it’s all part of the game.

WHAT IS FOAM ROLLING AND WHY DO RUNNERS NEED TO DO IT?
Foam rolling is a self-myofascial release, which is a form of self-massage. Used before workouts, it can help improve mobility and decrease pain. If you feel tight or stiff before a run or after your warmup, these foam rolling techniques can help release muscular tension.
If you run with tight or overactive muscles, it can affect your posture and your stride which could lead to muscle compensations (incorrect muscles doing the work) that cause imbalances that could eventually lead to an injury.
Runners can foam roll to help prevent hip, knee and ankle pain or injury, and to improve mobility for better performance.
Foam rolling can also promote recovery and reduce post-exercise muscle soreness.
We are a participant in the Amazon Services LLC Associates Program, an affiliate advertising program designed to provide a means for us to earn fees by linking to Amazon.com.

better foam rolling techniques. Save to your favorite Pinterest board for later.
WHAT TYPE OF FOAM ROLLER SHOULD I CHOOSE?
MEDIUM TO HIGH-DENSITY SMOOTH FOAM ROLLER
If you are new to foam rolling, I suggest you start with a medium to a high-density smooth roller to allow you to apply appropriate pressure to tender spots. You can advance to a grid or deeply textured roller as you loosen up and progress.

GRID FOAM ROLLER
A grid foam roller is what I use in the Shred Shed and is a middle of the road foam roller that has a grid that can help you dig deeper into tender spots.

DEEP TEXTURED FOAM ROLLER
A deeply textured roller can allow you to even dig deeper into the muscle tissue but may be more painful. I tested this Rumble Roller at the IDEA Personal Trainer Institute South.

BALL
A lacrosse ball or a textured ball can help increase the pressure on smaller hard-to-reach muscles like your hip flexors or between your shoulder blade and spine.

HOW DO I KNOW IF I NEED TO FOAM ROLL?
TRY THESE THREE SIMPLE MOBILITY TESTS
Most runners can feel that they have tight calves, hips, or hamstrings, but sometimes limited mobility or stiffness feels normal because you’ve been living with it for a long time. If you’re not sure if you need to foam roll, there a few simple tests you can perform to determine if have tightness that could be limiting your mobility and performance.
TEST #1: FLEXION

flexion test
With straight legs, bend over and touch your fingers to the ground just in front of your toes. You pass the test if:
Fingers touch to the ground
Even rounding of the spine
Hips move back
Knees don’t bend
POSSIBLE LIMITATIONS
Thoracic Spine
Lumbar Spine
Glutes
Hamstring
Calf
TEST #2 EXTENSION

extension test
With your feet together and arms straight overhead, biceps by your ears, arch your back and extend as far as you can. You pass this test if:
Shoulders and biceps stay aligned with your ears as you extend
Hips move forward in front of the toes
Even rounding of the spine
Possible Limitations
Latissimus Dorsi
Pectoral Major
Thoracic Spine
Lumbar spine
Hip flexors
TEST #3 ANKLE DORSIFLEXION

ankle dorsiflexion test
Get into a half-kneeling position with your front toes five inches away from a wall or object. With your heel flat on the floor move your knee forward to touch the wall. You pass this test if:
The knee moves 5” to touch the wall
Heel remains flat on the floor
The knee stays aligned over the center of the foot (not tracking to either side of foot)
Possible Limitations
Achilles
Gastrocnemius
Soleus
I FAILED THESE MOBILITY TESTS. HOW CAN I IMPROVE?
We are going to focus on five muscles to improve your mobility before a run and the foam rolling techniques you’re probably not already doing.
HAMSTRINGS
Tight hamstrings can reduce glute activity and cause knee and hip problems. What hurts isn’t always the source of the problem.
We often have tight hip flexors from running (or sitting), which pulls the hips forward which tightens up the hamstrings. We can help prevent hamstring pulls and increase our mobility with foam rolling.
Sit with your thighs over the foam roller and your hands supporting your weight behind you. Lean to one side to press your bodyweight onto one thigh. Increase the intensity by stacking your free leg on top.
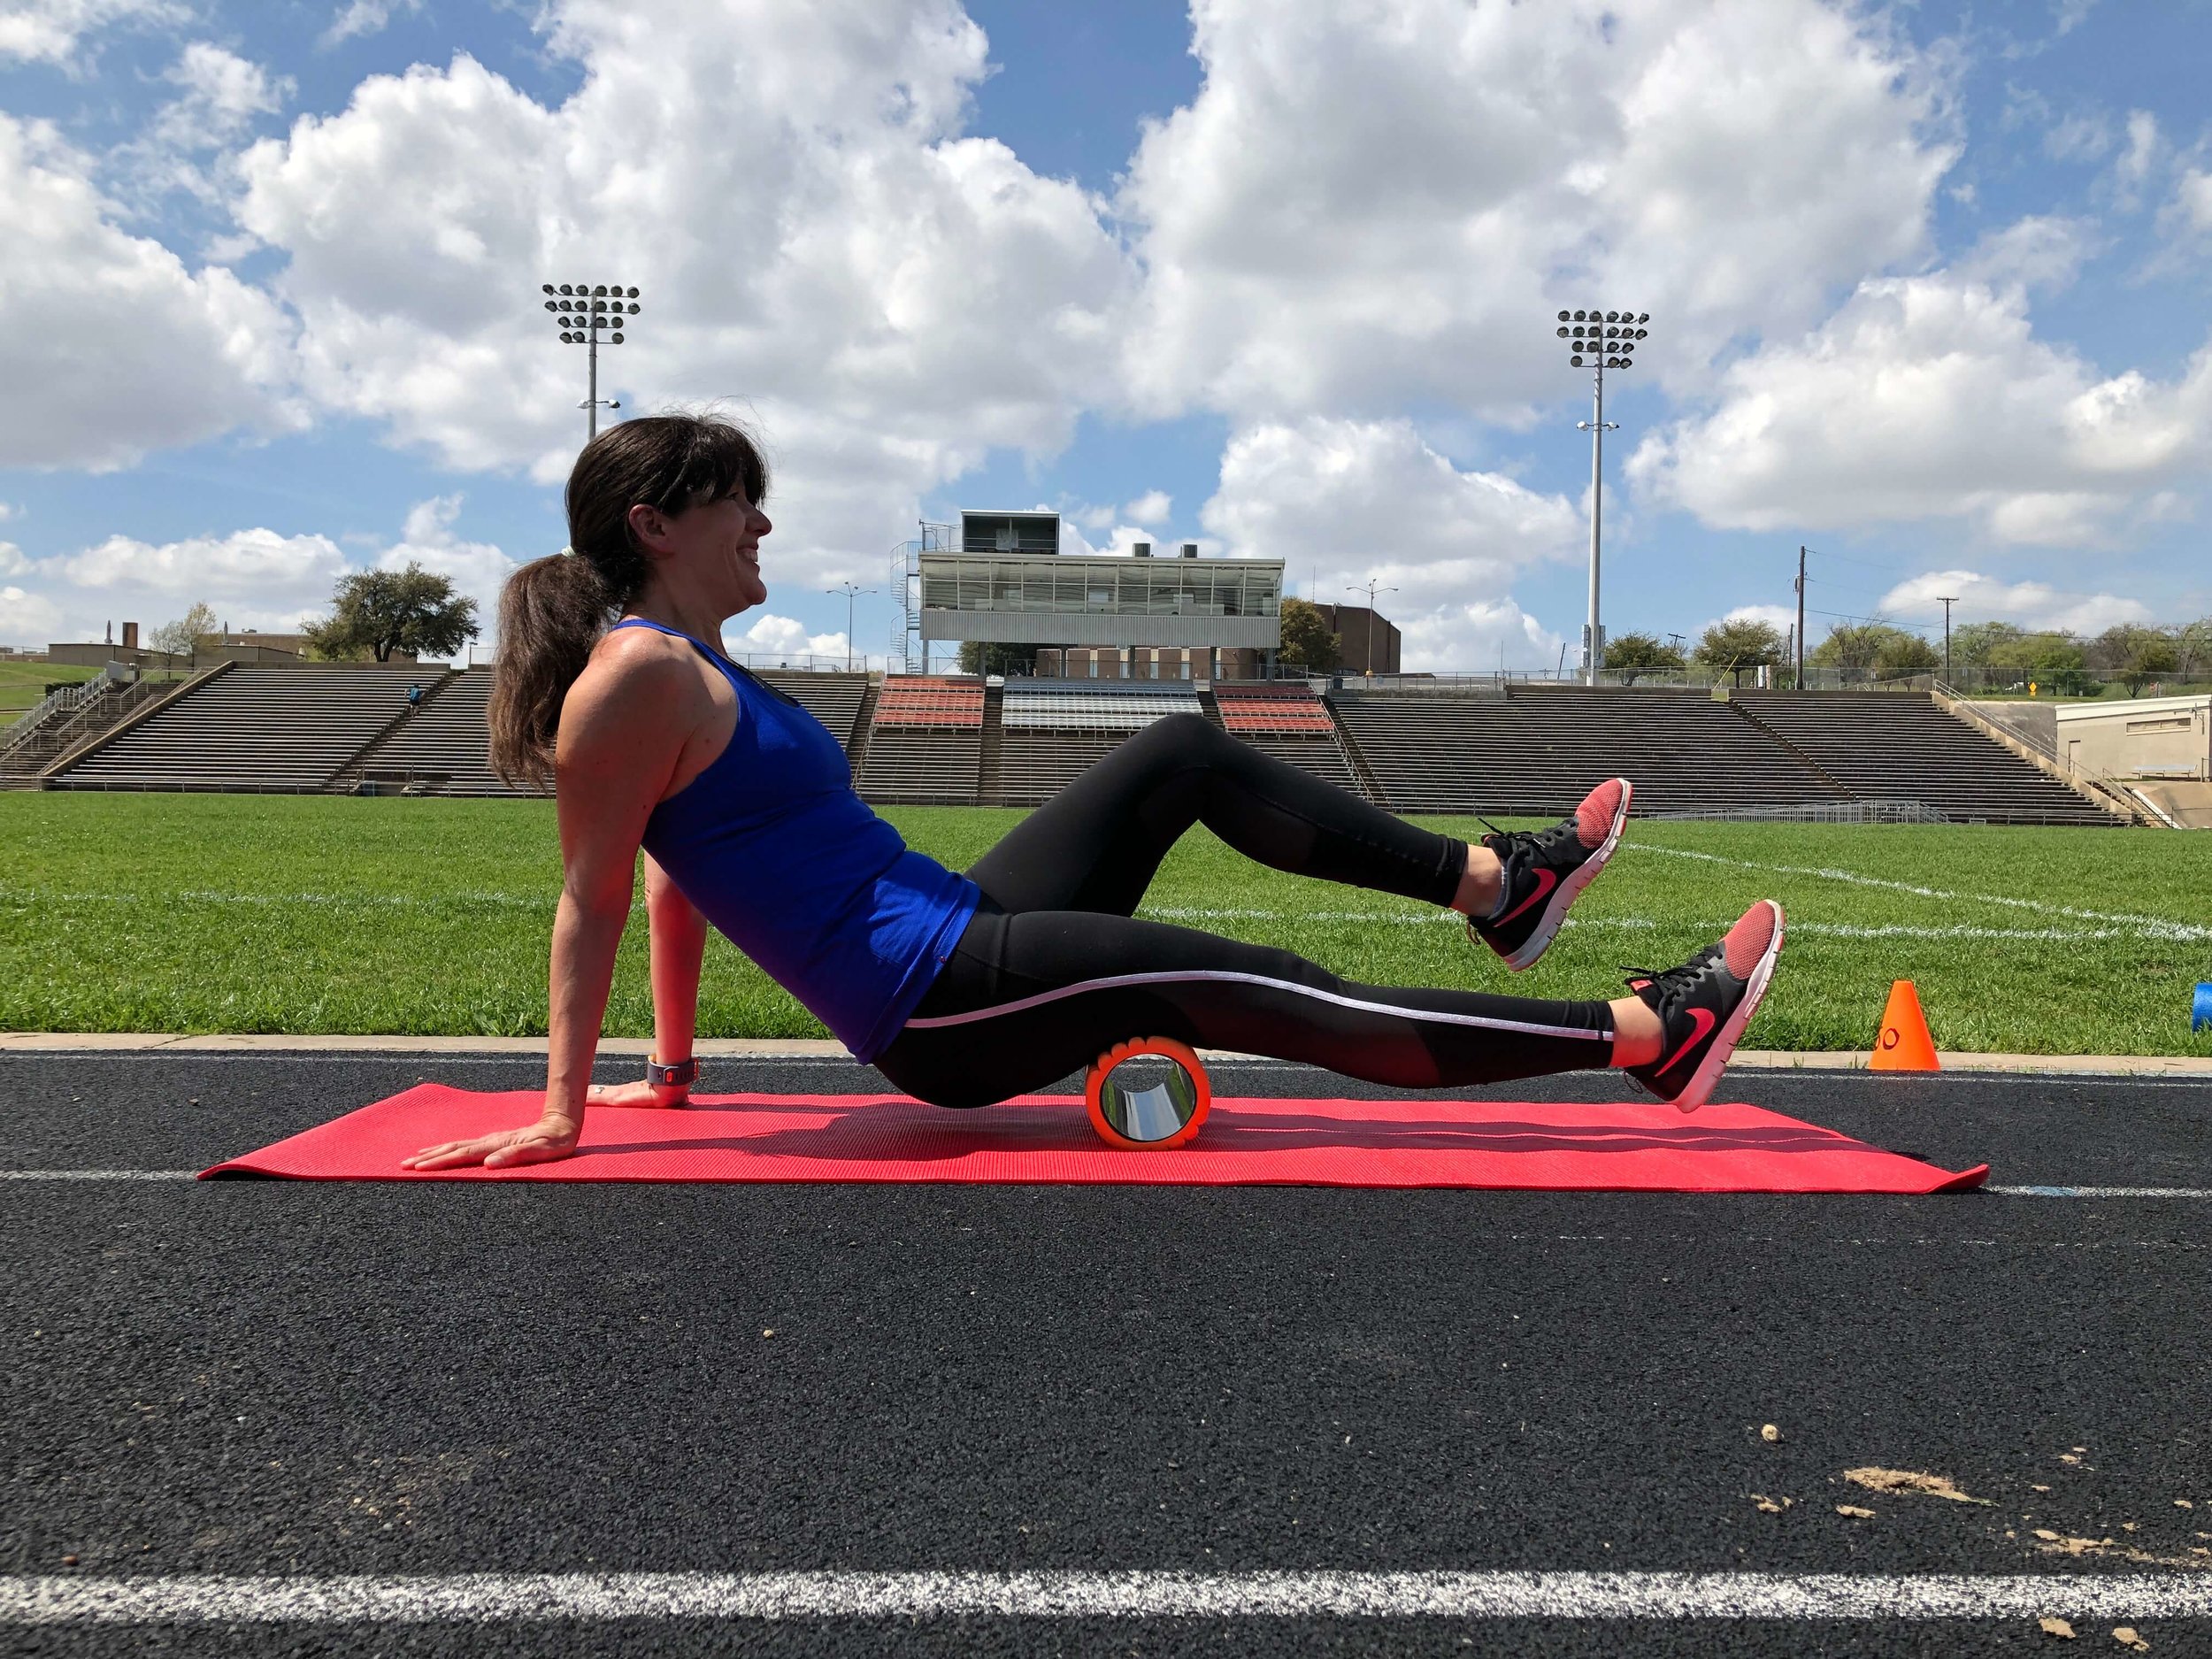
GLUTE/PIRIFORMIS
The muscles in our butt can get tight from sitting. Rolling can help ensure the correct muscles are firing, so we don’t get injured. If you suffer from sciatica and side of hip pain then rolling the piriformis can help alleviate symptoms.
Sit on the foam roller under your butt with your arms supporting your weight behind you. Shift your weight to one Glute. Cross the opposite leg over the knee and apply pressure.
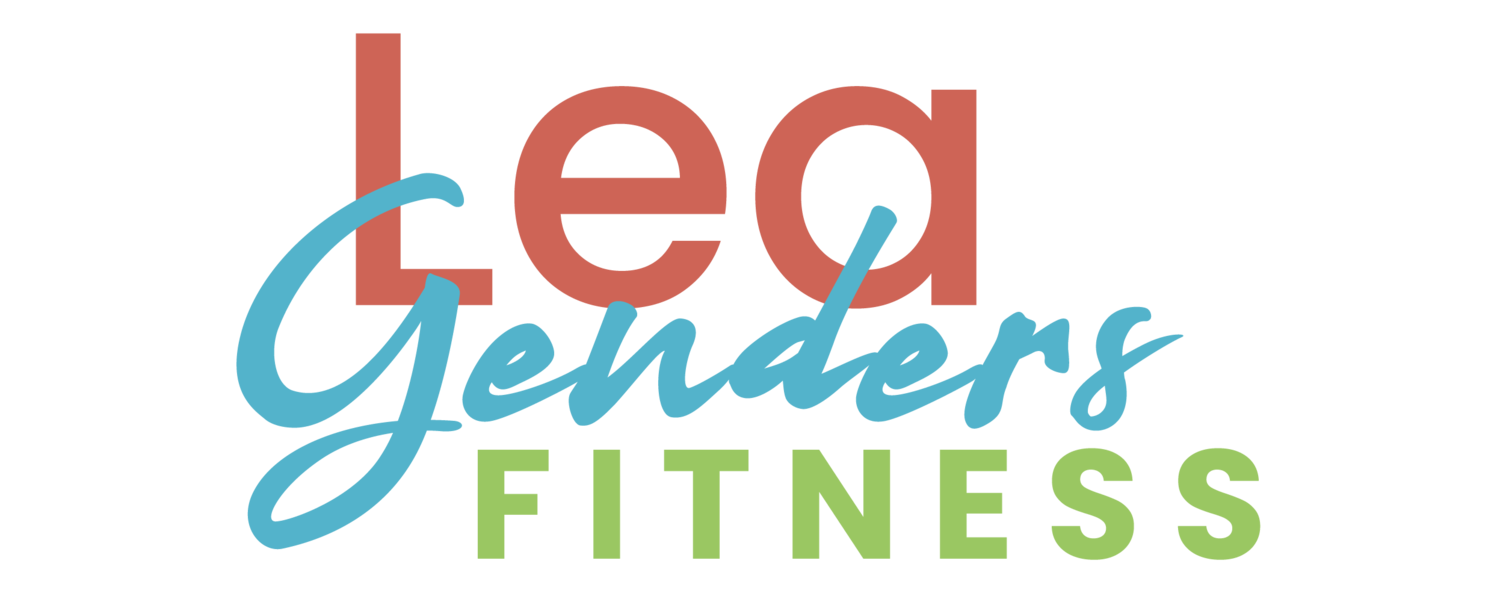
CALVES
Tight calves inhibit ankle mobility, which is essential for injury-free running. If you run a lot and also wear high heels (hopefully not at the same time), then calf rolling should be a regular part of your mobility exercises. Overactive calves can lead to plantar fasciitis and Achilles problems.

Position the foam roller under your calf muscles with your hands supporting your weight behind you. Lift one leg to apply your body weight to one calf at a time. To increase the intensity, stack your free leg on top and press down.
LATISSIMUS DORSI (LATS)
Don’t forget about your upper body. When we think of the muscles that we use for running, it is mostly the lower body. However, mobility in the upper body is essential for proper running form. If your lats are tight, it can limit your arm movement, and tilt your hips forward, because your lats attach to the back of your pelvis, which can distort posture and running form.

Lie on your side with your arm reaching over the foam roller that is perpendicular to your body length. Press the roller into the back part of your armpit and roll downward into your latissimus dorsi.
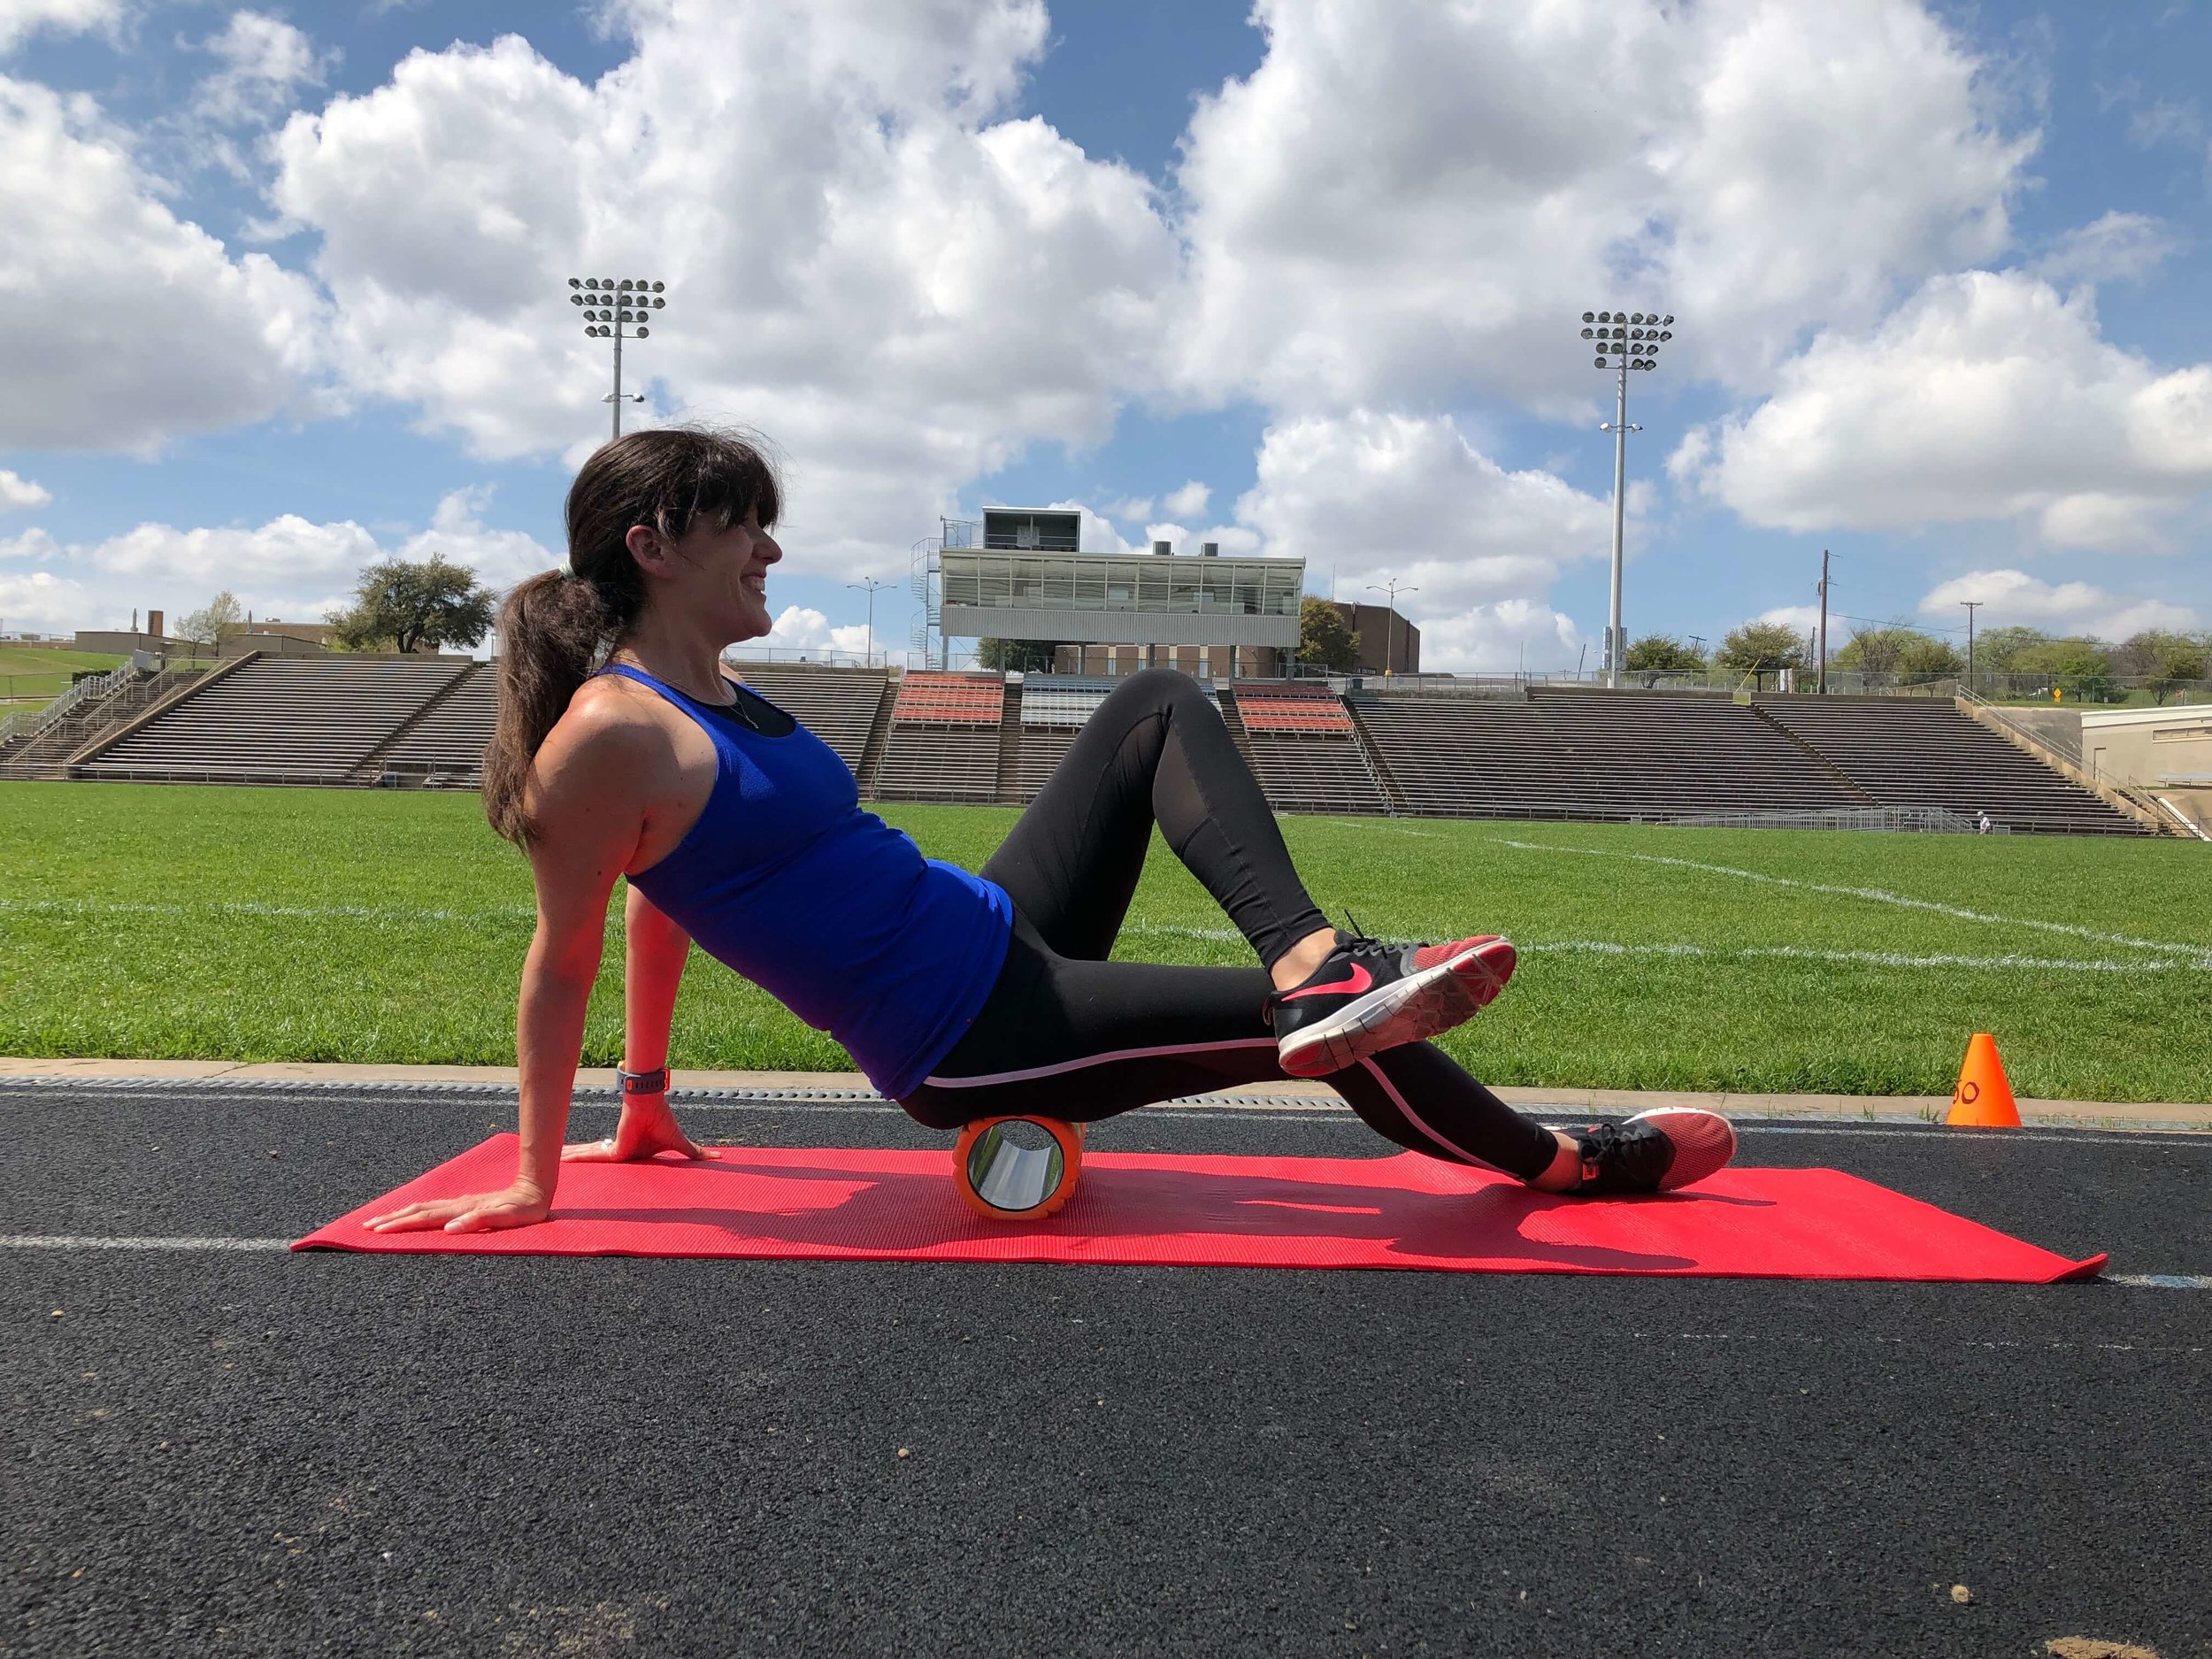
QUADRICEPS
Overactive quads can be the cause of knee or hip pain. Without proper mobility, runners can become quad dominant; this can cause improper movement patterns which can lead to an injury.
The quads and hip flexors tend to get overactive and tight and take over the jobs of the Glute max and deep core muscles that tend to get underactive and weak.

Position your body face down with the foam roller positioned under the front of your thighs and support your upper body on your elbows. Shift your weight onto one leg in order to apply pressure to the quads.
THREE FOAM ROLLING TECHNIQUES TO GET THE MOST OUT OF YOUR SESSIONS
If you roll over the muscle a few times with a little pressure, you’re not getting the most out of your foam rolling sessions. Use these techniques to maximize the results from your foam roller.
ROLL AND APPLY PRESSURE
Roll slowly over the muscle in an up and down motion until you feel a tender spot (you’ll know what I mean when you feel it). Press the foam roller firmly into the tender spot for 20-30 seconds max (more is not better here). Always deeply breathe while foam rolling and focus on keeping the body relaxed. If you start to tense up, release the pressure a bit until your body can relax again. Stop any move that continues to increase in pain as you apply pressure.
ROCK
As you are applying pressure rock the muscle side to side against the roller. Slowly move over the muscle to the next tender spot, apply pressure and rock back and forth. If you’re not rocking while you’re rolling, you’re not getting the most out of your roller. Rock and roll, baby!
RELEASE
While applying pressure to a tender spot, move the joint through the full range of motion. For example, while applying pressure to the quadriceps, bend your knee into flexion, so the bottom of your foot is parallel with the ceiling (or in my case, the sky). Continue to apply pressure while slowly moving the knee into flexion and extension.
bend at the knee while applying pressure to the quadriceps for the release technique
Try these techniques and then do the mobility tests again, you’ll often see immediate (temporary) improvement in range of motion after a single session. You have to be consistent with the work for more permanent results.
HOW OFTEN AND HOW LONG SHOULD I FOAM ROLL?
You will get better results by foam rolling for a short period of five to ten minutes a day than you will for 20-30 minutes once a week. Short, frequent sessions will bring the best results. Incorporate foam rolling as part of your warm up to ensure your body is mobile and primed to run.
Break each muscle into three parts: The lower, the mid, and the upper, and apply up to the three foam rolling techniques to each part of the muscle tissue for up to 30 seconds.
As an example, you would work on the lower part of the calf for 30 seconds, the mid-calf for 30 seconds and the top of the calf for 30 seconds. Each muscle will take a minute and a half so your foam rolling session should take less than 10 minutes.
You can move quickly over the sections that don’t feel tender under pressure, and only focus on the tender areas. You don’t need to work on muscles that aren’t tight or restricted.
IS FOAM ROLLING SUPPOSED TO HURT?
While foam rolling may be uncomfortable at times, it shouldn’t be outright painful. You should be able to breathe through it while maintaining a relaxed body. If you hold your breath or tighten up your body, that is a sign you need to ease up on the pressure a bit.
If it is excruciating, that means you need it the most, but ease into it with a smoother roller and lighter pressure until the muscles start to relax. The more often you foam roll, the less painful it will be in the future.
Are you ready to rock and roll? Let me know how it goes! Questions? I’d love to help.

I adapted the information in this post from Brian Bettendorf’s Rumble Roller session on “Using Movement Screen to Roll Better and Roll Less” that I attended at the IDEA personal trainer Institute South in Dallas TX.
Did you like this post? Do you know someone who might benefit? It helps me when you share with your friends and followers on Facebook, Twitter, and Pinterest.


When people talk about performance-enhancing drugs, they aren’t usually talking about caffeine, but if used correctly, caffeine can improve your running performance. In this blog post, I’ll teach you how to use caffeine to boost your performance. for key workouts or race day.